
A hardwood flooring installation project can quickly become a nightmare if you don't know what you're doing. While hardwood floors are a truly great option, getting them installed requires a solid plan.
This guide breaks down the step-by-step process, making it foolproof for even the most novice DIYers.
Key Summary
- Hardwood installation patterns include parquet, chevron, and herringbone.
- Check the moisture levels in the subfloor to prevent issues like warping or buckling.
- Luxury Vinyl Plank (LVP) mimics the look of natural wood and offers durability and water resistance.
- Allow the hardwood flooring planks to acclimate to the room's temperature and humidity levels for at least 72 hours.
- Follow manufacturer instructions carefully to ensure proper adhesion or nailing technique.

Preparing for Installation
Proper preparation can make the difference between a smooth installation and a headache-filled ordeal. Here's what you need to do:
1. Check Subfloor Condition and Moisture Levels
The condition of your subfloor plays a significant role in the success of your hardwood flooring installation. Ensure the subfloor is clean, level, and free of debris or protruding nails.
It's essential to check the moisture levels in the subfloor to prevent issues like warping or buckling later on. Also, fill in any gaps or cracks with a suitable filler material.
2. Gather All the Necessary Tools
Here's everything you'll need:
| Adhesive or nails (depending on your chosen installation method) |  |
| Tape measure |  |
| A saw (preferably a circular saw) | 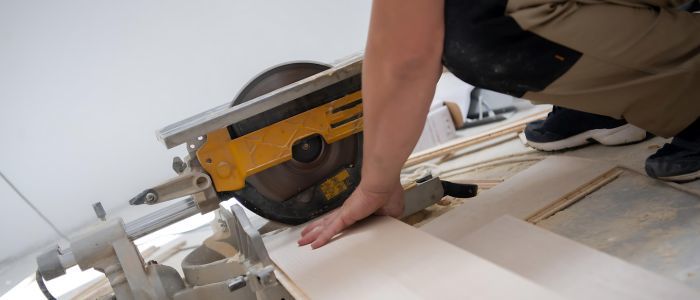 |
| Hammer or nail gun | 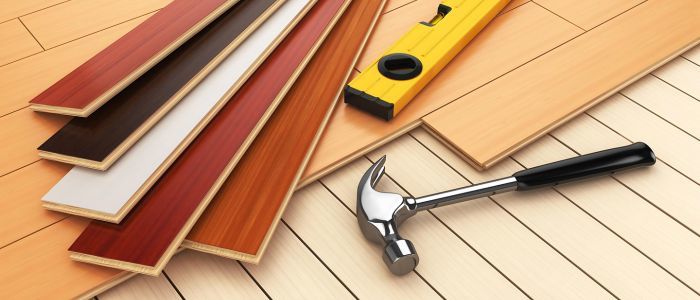 |
| A crowbar | 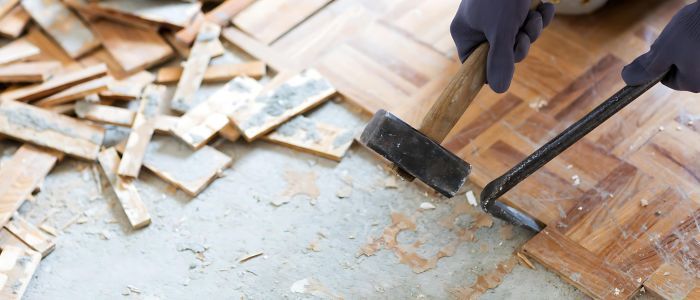 |
| Chalk line and spacers | 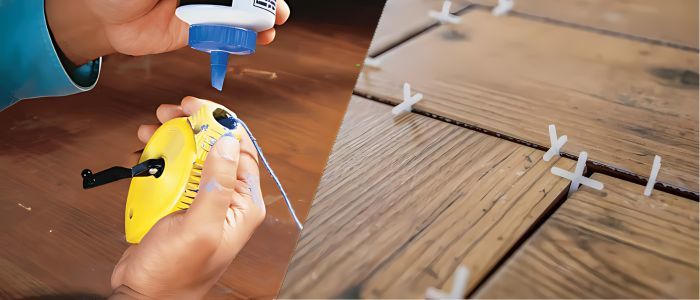 |
| Safety equipment such as goggles and gloves |  |
3. Clear the Installation Area
Remove all furniture, rugs, and other obstacles to ensure you have a smooth and quick installation process. Make enough space to provide room to work and maneuver the flooring materials.
4. Calculating Square Footage and Layout
Grab your trusty tape measure and head to the area where you'll install the flooring. Measure the width and length of the room, making sure to account for any alcoves, closets, or irregularities in the shape.
Once you have these measurements, multiply the width by the length to calculate the room's total square footage. For example, if your room is 12 ft wide and 15 ft long, the total square footage would be 180 sq ft.
Planning the Layout
This step is very important for achieving a professional-looking finish and minimizing waste. Start by considering the orientation of the room and any architectural features, such as doorways or fireplace hearths, that may impact the layout.
One essential aspect of planning the layout is to avoid silver cuts. These are thin, narrow pieces of flooring that can be difficult to install and detract from the room's overall appearance.
To avoid sliver cuts, aim for balanced rows of flooring that maintain a consistent width across the room. Divide the total square footage of the room by the width of the flooring planks you plan to use.
This will give you the number of full-width rows needed to cover the room's width. If you end up with a partial row at the end, adjust the layout to ensure that the partial row is at least half the width of a full plank.
PRO TIP: Measure twice, cut once! Take your time to ensure each plank fits perfectly against the next and that there are no gaps or uneven spots.
Step-by-Step Guide to Installing Hardwood Flooring
Now that you've prepared your space and gathered your materials, it's time to dive into the installation process. Follow this step-by-step guide to ensure a successful hardwood flooring installation:
1. Acclimate the Flooring
Before installation, allow the hardwood flooring planks to acclimate to the room's temperature and humidity levels for at least 72 hours. This helps prevent issues like expansion or contraction after installation.
2. Start with a Clean Slate
Ensure the subfloor is clean, dry, and level before laying down the first hardwood flooring plank. Use a vacuum or broom to remove any dust, dirt, or debris, and patch any cracks or holes with a suitable filler.
3. Underlayment
If you're using an underlayment, roll it out across the entire installation area, overlapping seams by a few inches and securing it with tape. Underlayment helps reduce noise, provides insulation, and acts as a moisture barrier.
4. Begin Installation
Starting from one corner of the room, begin laying down the hardwood flooring planks, leaving a small gap around the room's perimeter to allow for expansion. Use spacers to maintain consistency between planks.
5. Stagger Planks
Stagger the end joints of adjacent rows of hardwood planks to achieve a natural and aesthetically pleasing look. This helps distribute weight evenly and prevents unsightly patterns from forming.
6. Secure Planks
Secure the hardwood planks to the subfloor using either adhesive or nails depending on your chosen installation method. Follow manufacturer instructions carefully to ensure proper adhesion or nailing technique.
7. Trim as Needed
As you reach the edges of the room, use a saw to trim the hardwood planks to fit. Remember to leave a small gap around these obstacles to allow for expansion.
8. Complete the Installation
Continue laying down hardwood planks row by row until you reach the opposite side of the room. Use a crowbar and hammer to tap the final row into place if necessary.
9. Add Finishing Touches
Once all the hardwood planks are installed, remove spacers and install baseboards or quarter-round molding to cover the expansion gap around the room's perimeter. Use a finish nailer or adhesive to secure the molding in place.
Once the flooring is installed, it's time to add the finishing touches. Install baseboards, quarter-round, and other trim pieces to cover the expansion gap and give the room a polished look.
10. Final Inspection and Cleanup
Before calling it a day, take a final walk-through to inspect the installation for any flaws or imperfections. Clean up any debris or dust, and admire your handiwork.
Ready to Get Started With Your Hardwood Flooring Project?
Schedule in-home appointment. We'll provide a FREE, same-day design & quote.
BOOK NOWTips for Achieving Professional Results
Take Your Time and Pay Attention to Detail
- Align planks properly and ensure they're laying flat before moving on.
Regularly Check Your Progress
- Use a straight edge or chalk line to ensure rows are straight.
- Check for any gaps or uneven spots and make adjustments as needed.
Ensure Proper Alignment and Spacing
- Use spacers to maintain the correct expansion gap.
- Align each plank with the ones next to it and ensure consistent wood grain direction.
Use the Right Tools
- Invest in a quality flooring nailer or adhesive applicator.
Use a tapping block and rubber mallet to tap planks into place gently. - Wear safety equipment like goggles and ear protection.
Finish Strong
- Install baseboards, quarter round, and trim pieces to cover the expansion gap.
- Take your time with the final details to ensure a polished look.
Obstacles You May Encounter
While installing hardwood flooring can be a rewarding DIY project, it's essential to be aware of potential issues that may arise along the way.
Here are some common problems you may encounter and how to address them:
| Issue | Solution |
|---|---|
| Layout Issues | When encountering obstacles like doorways and corners, use a jigsaw or coping saw to cut the planks to fit around these obstacles, ensuring the proper expansion gap. |
| Uneven Subfloor | If your subfloor is uneven or has dips and valleys, it can cause the hardwood flooring to be bumpy or squeaky. Before installation, level the subfloor using a self-leveling compound or plywood shims as needed. |
| Moisture Issues | Excess moisture in the subfloor or environment can lead to problems like warping, buckling, or mold growth in hardwood flooring. Ensure that the subfloor is dry and that proper moisture barriers are in place to prevent moisture from seeping into the hardwood planks. |
| Improper Installation | Improper installation techniques can result in gaps between planks, uneven surfaces, or damage to the hardwood flooring. Take your time to carefully follow manufacturer instructions and seek professional help if needed to ensure a proper installation. |
| Expansion and Contraction | Hardwood flooring naturally expands and contracts with changes in temperature and humidity levels. Failure to leave adequate expansion gaps or acclimate the flooring properly can result in buckling or gaps between planks. |
When to Consider Hiring Flooring Installation Companies
If you're not confident in your abilities or if the job requires specialized skills or equipment, don't hesitate to call in the pros. Hiring a professional flooring installation company can save you time and ensure a high-quality finish.
Questions to Ask Potential Installers
If you decide to hire a flooring installation company, do your homework. Ask for references, inquire about their experience and credentials, and get a detailed estimate in writing before deciding. Here are five essential questions to ask:
1. What experience do you have with installing hardwood flooring?
It's important to know how much experience they have with hardwood flooring. You can ask them how long they've been doing it and how many projects they've completed successfully.
A contractor with lots of experience will have a good track record and know how to deal with different challenges that may come up during installation.
2. What qualifications and certifications do you have?
It's also a good idea to ask about the contractor's qualifications and certifications in hardwood flooring. Certifications from the National Wood Flooring Association show that they take their work seriously and meet industry standards.
3. Can you show me examples of your previous work?
Seeing examples of a contractor's work before you hire them is always a good idea. Ask them to show you some past hardwood flooring projects they've completed. This will give you an idea of the quality of their workmanship and attention to detail.
4. Do you offer help with design and choosing materials?
Having a contractor who can help with design and choosing materials can be beneficial. They can advise you on what type of wood to use and what finish would look best in your home.
5. Do you offer any additional services?
Some contractors just install, while others offer additional services like refinishing. Asking what services they provide will ensure they meet all your hardwood flooring needs.
Conclusion
Installing hardwood flooring may seem difficult, but it's entirely achievable with the right tools, materials, and know-how. This step-by-step guide will prepare you for the installation and associated challenges.
Remember to be patient and don't hesitate to hire professionals if needed. Let's transform your space one plank at a time.
